Sunday, February 28, 2010

Great Tool: Google Alerts

Google Alerts is a great way to keep track of what is going on online. If you have a Gmail account you can set up an alert for a specific term and Google will email you when that term is posted on the internet. You can set it up to email you immediately or less often.


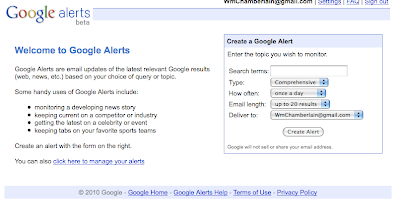
You can manage your alerts and change their settings or even delete them.


This is what the alert email looks like. It puts the key term in bold so you can see how it is used in context.

Why would you want to set up an alert? If you are like me, you want to know when you are being discussed on the internet. Another great way to use it is to see if someone is talking about your blog, wiki, podcast or other content you have created and posted online.

I love to use it to see who is posting about a pet project of mine: #comments4kids.

Thursday, February 25, 2010

Cooking With Jacob:Independent Research Projects Can Foster Learning

My digital media class has been tasked with doing an independent learning project. The only guidelines I have given them is to find something they are interested in and to record their learning in some digital form. The purpose of the assignment is to allow them to have a little fun with their learning. (Believe it or not I do have the option of doing something strictly for fun!)
The students have the opportunity to choose any digital tool to help them. One of my students, Jacob, chose to use a wiki to record what he is doing. The wiki, titled Cooking With Jacob, reflects Jacob's new interest in food (a subject I hold near and dear to my stomach!) He has started to record recipies he is collecting.
I have encouraged my students to use audio, video, and pictures for recording learning to go along with text because they are so engaging to the audience. Jacob came into my lab yesterday and grabbed our digital camera and tripod to record a presentation he was making in speech. Here is the video he recorded and posted on his wiki:
Isn't this what we are looking for as educators? Not only do we see the integration of technology into the speech class, but more importantly we see learning being connected through two different classrooms. When I changed jobs my biggest goal was for my class was to allow students to use digital tools to reflect what they are learning in their content areas. Yesterday a student took the first step.

Monday, February 22, 2010

Check Out Kidblog.org

Kidblog.org may be just what the teacher ordered, especially for students under 13 years of age. I have spent many years looking for a way for my under 13 students to create content on the internet with limited success. Most sites require a person be 13 years or older before they can create an account. If they create an account under 13 they break the TOS (terms of service) which means their account could be suspended or deleted.

Kidblog allows teachers to create class blogs for their students under 13 in a very easy way. After a teacher signs up for an account and create their blog, they can simply add the students name and password. When the student goes to the blog site, there is a drop down menu for their name and they only have to enter their password.

Another great feature of the site is that both comments and posts can be moderated. For those of you that have students that are beginning their online experience and may be inclined to share too much information or those who might want to start flaming others this is a must.

The major drawback to the site is that it has no customization options. You can't add the great widgets, slideshows, or plug-ins you may be used to. You can't even change the template or colors.

Despite the drawbacks, I think Kidblog is a great way to introduce new teachers and new students into blogging. While it does lack some functionality, it will definitely hit the spot for many students and teachers.

Sunday, February 21, 2010

Adding Streaming Video to Your Blog

After reading Miles Webb's, @NZWaikato, post on adding video to your blog, I decided to take up his challenge about how to stream video. First let me say this can be a very controversial subject. It seems that many educators, teachers and administration, are hesitant to open up their classrooms to public scrutiny. This is not a decision to enter into lightly. If you are interested in my story, here is a link to a post I wrote about it.

The first thing I need to address is the purpose of streaming the video. I stream video in my class so that others can see what we are doing. With a back channel, I can use the video to have a conversation with others outside my classroom. I also stream video to share specific things we are doing in class. I also use the streamed video to record events that I can post to my blogs.

Step 1, secure permission of your administration and, if necessary, parents. Our districts policies require parents to "opt-out" of being included in media. Since this includes year book, pictures for newspapers, news stories, etc. this has not been a problem. Since our district implemented the policy we only had one parent ask for their student to not participate.

Step 2, Get a camera. It is possible to use a cheap web cam without sound to an expensive camcorder that has video and audio out. I use a cheap no-name webcam in my Digital Media Center, a nice Creative webcam that is audio capable in my classroom, and an old Sony Steady Shot camcorder for video and Blue Snowball microphone for church.

If you just want to stream video without audio, don't spend a lot of money on a webcam. The video quality will be fine. If you want to record your video with or without audio using your computer you will want to invest in a high end web cam or an inexpensive camcorder. I use my camcorder with video out through the firewire port and import it into my bottom end Mac book. This gives me great video. I don't like the adio quality as well so I purchased a Blue Snowball to import the audio and it has made a noticeable difference.

Something to consider when choosing a web cam or camcorder is what will you use it for. Camcorders have the most flexibility but they cost the most. Webcams are usually inexpensive, but they have to be tethered to the computer. A seperate microphone can not only improve audio quality, but it also gives you a good tool to record audio. Here is a link to audio my students created in my class.

Step 3, choose your streaming site. I use Ustream.com to stream my video. It has several options I like including an optional chat. Here is a link to a post where I explain how I used Ustream to stream and record a presentation in my classroom with the chat enabled. There is also Stickam, and Mogulus. I periodically go back to these to see if they have improved enough or added new functions that may cause me to switch.

Step 4, start streaming. I can stream video and audio and record it with Ustream. I can place the streaming video on a blog, wiki, or a static page like Google sites using embeddable code. I can also do the same with the recorded video. This gives you lots of options.

Finally, here are some things you may want to consider streaming live: athletic events, musical events, teacher trainings, a class lesson, student presentations, science experiments, a student creating art, visitor presentations, awards assemblies, or, if you are crazy like me, everything.

If you are interested in streaming, but needs more information, don't hesitate to ask.

Friday, February 19, 2010

A Lesson in Copyright

A few days ago pictures started to appear in my moderation que on my 7th grade class Ning. Two of my students had found a site that had pictures they liked from the Manga series Vampire Knight. Not wanting to break copyright law I deleted the pictures and talked to my classes about copyright, creative commons, and how to ask for permission to use copyrighted images.

One of the students that had posted the pictures wanted to ask for permission to post the pictures so I had her bring in a copy of her book to get the publisher's information. The book was published by Viz Media LLC.

I went to their website and found an online form to fill out.

I had Hou type on the form and ask for permission to post the pictures.

I like the Vampire Knight to put on my blog.....but my teacher wants me to ask permission if i could put it on my blog.
-Houa


Then I added:

My student was posting pictures found on websites from the Vampire Knight series. I would not allow them to be posted because we don't have the right to publish these pictures. We decided to contact you and ask for permission.

The site she would like to post the pictures on is at: http://noelclassof2011.ning.com/

Thank you for your attention to this matter,

-Wm Chamberlain
Noel Elementary School
Noel, Missouri

It isn't enough to discuss copyright with our students, we need to help them find solutions to copyright issues. While I don't know if we will be given permission to post these pictures I do know that Houa has learned how to ask instead of just take. The process is more important than the outcome.

Tuesday, February 9, 2010

Creating Digital Video Reflections

I have been meaning to do this all year, but things don't always happen on my time table. Today I finally finished setting up my Digital Video Reflection area. My plan has been to have a place where students can jump in and make a quick video where they talk about their learning and then post it to their blog or the class ning. I believe that reflections is the most important step in the learning process and I want to be able to facilitate it in my school.

Why did I set this up when students are perfectly capable of writing their reflections? The answer is simple, because it is awesome! Let's face it, we live in media rich culture. Why read when we can see a picture; why see a picture when we can watch a video?

Why put up the students reflections where they can be seen by others? The same reason I write these posts, because I want people to see them, reflect on them, and hopefully leave a comment. My students want their learning validated just like I want to have my learning validated.

Here is my set-up. I use a Logitech webcam mounted on a tripod (with masking tape) to get enough elevation for the picture. The webcam is hooked up to my laptop along with my Blue Snowball microphone. Although the sound is not as loud with the Snowball, the students don't have to wear the headphone/microphone combo.

I set up a barrier so that the student recording wouldn't feel watched as they create their videos. It is hard for many to put themselves "out there" with their recordings and this can help them feel more comfortable.

This shot is from the back. I put the screen behind the student so it looks a little nicer than the wall/window combination. I plan on getting a few more screens to place around to cut down on the background noise and to make the student more comfortable. It looks raw, but if you have ever been to a television station before, only what shows on the camera matters.

Here is Yessy doing the first video reflection on the new set-up. She does an amazing job with her explanation. After she was finished I had her post the video on the seventh grade class ning. It will be used as an excellent example for the other students to emulate.

I would love to be able to set up a station like this in each classroom so that students would have access to them all the time. Imagine students having a Youtube channel that is devoted to what they are learning!